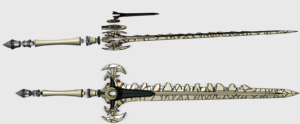
Inspired by the video games in the Fire Emblem series, this Sword of the Creator is carried by both male and female versions of Byleth.
This prop is modeled, printed, and finished by me in all plastic. Metal support rods may be used inside for strength, but there is no external metal on this item. Blade measures approximately 32″ long, overall size is approximately 11″ x 47″.
Order the finished version at https://mkprops.storenvy.com/products/31315285-byleth-sword-of-the-creator-fire-emblem
Or, for a build your own kit, https://mkprops.storenvy.com/products/31994230-byleth-sword-of-the-creator-kit-fire-emblem
The kit comes with the following parts:
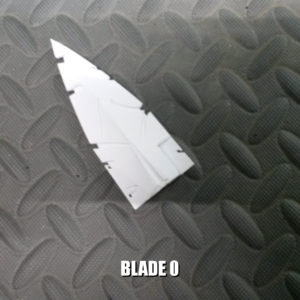


To assemble the kit, first glue together the blade. We use a combination of some E6000 spread onto the flat connecting parts, with small dots of superglue to help hold things together while the E6000 sets.
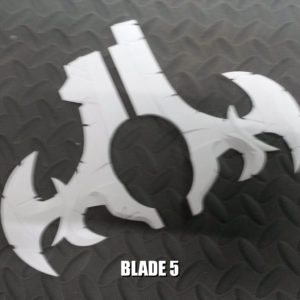
It’s generally easiest to start with the sections starting at 0, completing with the combined 4 and 5, and sliding the center into the hole formed at the base of the blade. When assembling here, we tend to keep the ‘teeth’ side of the blade always to the left, making it easier to line everything up, but the blade segments can only smoothly go together in one orientation due to the way the locking portions are offset. If you want to use a support rod, you can slide a 3/16″ thick, 28.5″ long metal or wood rod from the bottom of the center up into the blade, using the hole in the center to help push the rod the final distance so it disappears completely into the blade.
At this point, you may want to do any final sanding, applying bondo, or other finishing steps, including painting, since all the parts are set up as individual colors.
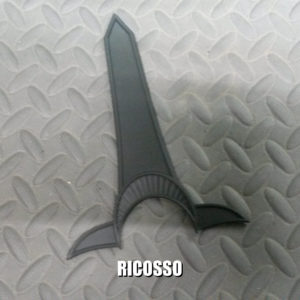
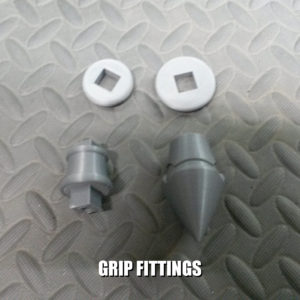
For paints, we recommend Rust-Oleum 2X UltraCover Paint + Primer as a base coat, generally at least 2 coats per part. Matte white for the blade and grip, black for the grip fittings and ricasso.
For grip fittings, next is a gloss clearcoat, followed by Rust-Oleum Metallic Finish Bright Coat Chrome to get a shiny finish.
For the blade and grip, it may depend on what color and look you want. Here, we tend to use an aged ivory, followed by a matte or semi-gloss clearcoat to seal the paint, but depending on the reference art you go by, it could be better to leave the parts white with the same clearcoat, or a darker tan or brown followed by the same clearcoat.
To continue assembly, glue on the ring and ricasso on either side of the blade. For the grip, attach the smaller ring, grip top, larger ring, and main grip. If you want to use a second support rod for this section, you can slide a 3/16″ thick, 9″ long metal or wood rod up from the base of the first pommel section. Finally, attach the two pommel sections, and your sword is complete.
There are optional fake rivets included in the kit if you want to add the detail straps to the guard section, which can be made in leather or pleather, glued to the blade, and then the rivets glued on top.